A post was split to a new topic: ESP32 certificate errors
The Toniebox needs to be powered through all this, correct?
Also, which is the adapter which didnt work for you? I got one which directly plugs into the USB port and I don’t get any output at all.
EDIT: No output, because my user didn’t have permission to /dev/ttyUSB0.
I had issues because I first put my UART to 5 V. Check to make sure it is set to 3,3 V. And remember to short J100 before you power up the box.
All worked for me now.
I used this adapter: https://www.amazon.de/dp/B08T24NML9.
For the documentation, I am missing an explicit mention of powering the board while having it connected to the UART. Connecting the battery worked for me. And yes, also mention to put it in 3,3V mode.
For the troubleshooting section, add a section for correct permissions for the USB device. Suggested by esptool: sudo usermod -a -G dialout $USER and then reboot.
Thanks for the hint with the hint ![]()
I added the 3.3V Hint in the the new Web Gui. The new Webgui already states, that the box should be connected to power.
The other hint can be added by you in the github repo of the wiki page.
Hi guys,
stupid questions, but where is VCC located on the board?
have a look into the wiki: Debug port | Toniebox Hacking but vcc is CC3200 releated?
this here is about ESP32… another version of the box
I managed to flash the device. Still confused about the 3.3v and 5v as NO power input is required by the UART controller …
It’s the first time I use uart. As described I
Tony box is powered up, then I connected the UART to the pins on the tony box and then I open the Gnome-terminal and run.
screen /dev/ttyUSB0 115200
I only get an empty black screen. (which seems not able to be closed by CTRL+C)
What should I do?
The Problems was:
- I did tx to tx and rx to rx
but i had to change rx to tx and tx to rx - also I had to ‘screen’ before I boot up.
what is the problem when i enter
root@teddycloud:/teddycloud# teddycloud --esp32-extract data/firmware/ESP32_<mac>.bin --destination certs/client
and the feedback is
bash: mac: No such file or directory
[edit]
If I replace with something other. I get an output but this:
root@teddycloud:/teddycloud# teddycloud --esp32-extract data/firmware/ESP32_test.bin --destination certs/client
TeddyCloud v0.5.2 (454631f) - 2024-05-13 12:12:26 +0000 ubuntu linux-x86_64(64)

[options] specified 'esp32_extract' as 'data/firmware/ESP32_test.bin'
[options] specified 'destination' as 'certs/client'
INFO |settings.c:0770:settings_load_ovl()| Load settings from /teddycloud/config/config.overlay.ini
INFO |settings.c:0770:settings_load_ovl()| Load settings from /teddycloud/config/config.ini
INFO |settings.c:0770:settings_load_ovl()| Load settings from /teddycloud/config/config.overlay.ini
ERROR|esp32.c:0765:esp32_fat_extract()| File does not exist or is too small 'data/firmware/ESP32_test.bin'
I assume int the how-to there is missing a part where you find the mac address.
the file should have the macaddress in the name if you are using the new web gui to do that.
the macaddress is also on the bottom cover of your box.
that also not worked. I tried capital letter and not capital letters.
have you tried to flash your box with the new web gui? Maybe this would help you.
in the process you will get a link to download the unpatched firmware which you can then use for extracting the certificates
OK. It seems the “newbie documentation” lacks a lot of step.
-
Please add a hint or a link with information how to change the volumes that way that the files like the Firmware are accessible.
-
Please add a hint, that you have to connect RX to TX and TX to RX.
-
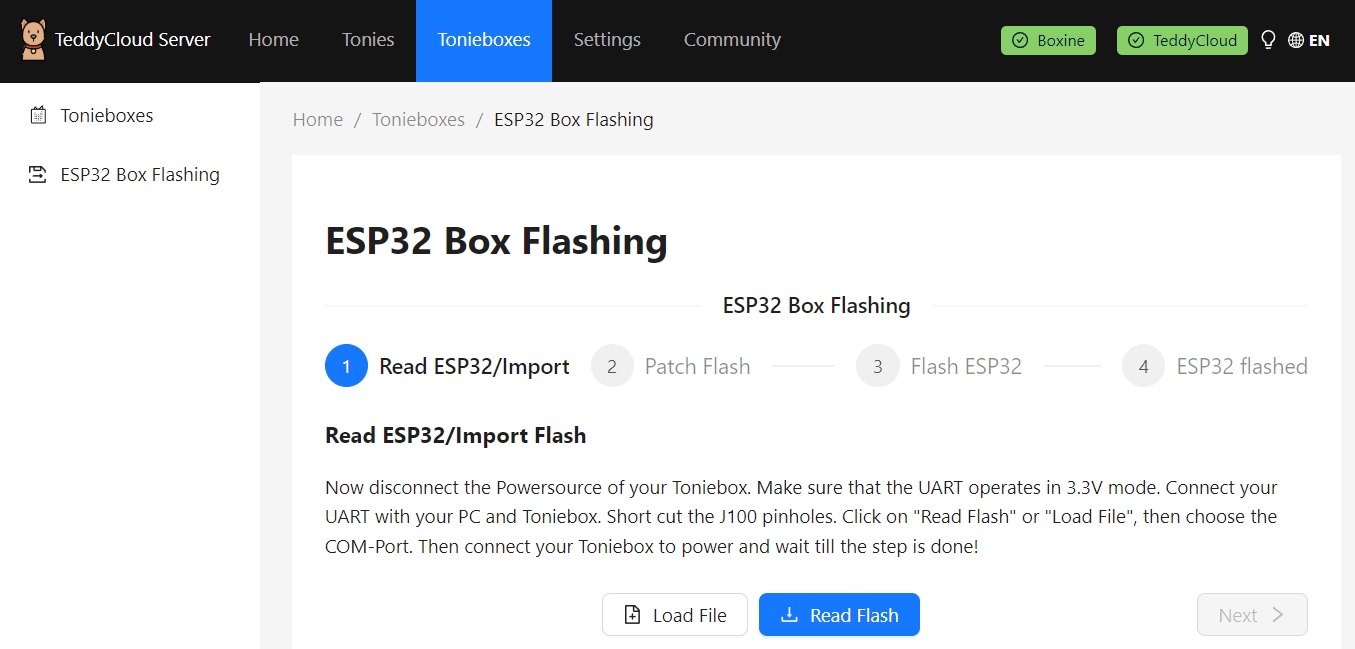
When teddycloud is running, let’s test the UART connection, to do this, connect your UART to the USB port of your computer and to the contacts on the Toniebox.
…
Here you see the command and the output after starting the Box in normal mode.
Is easy to missunderstand. The importand part should came earlyer in the Text. I propose to tell the basic like:
- Power off the toniebox
- Connect J100
- Connect The UART to usb and to the pins (Tx to Rx and Rx to Tx)
- Start Screen
- Power on the Toniebox
- The Step:
Now exit the serialmonitor (ctrl+a, ), switch to the web interface and click on “Read ESP”.
Only works after you activated https and use google chrome or Edge.
→ Please add this information
I was a bit surprised, that you have to do this over the website and could not do it also from the CLI. At the end I assumed this is not a required step, because I missed the Read ESP button, and wondered why I was not able to run the extraction process.
- After solveing that I was able to patch it on the websurface but writing the image was not possible. I had to use the esptool for that. For that to work I had to change the docker-compose.yml to use local directory. so I was able to get the patched file and patch it over CLI.
At the end:
→ Please decide If you use the CLI for any operation. (I’m a fan of GUIs but the webgui seems not finished now. AND in my case I had only firefox on my Linux).
To follow this Guide, and I’m a Newbie in using UART, as it is every sessions and researched calculated took me in total 6h to complete.
Maybe start reading and it overread half of the documentation, like swapping rx/tx it’s even mentioned in the FAQ at the end
As well read the official documentation, as mentioned in the main post
The goal for ESP32 is, that only the new WebGUI is needed for flashing the Toniebox.
The current develop branch is a first step towards this. From Toniebox perspective this already works completely. From Teddycloud perspective, the private certificates for accessing Boxine cloud are missing in that process. So only the certificate extraction from the original dump is currently still a manual step.
This guide here was provided by a user and was and is helpful for many people. It’s now quite a while ago since it was first published and there were recently some changes in the new WebGui which are not yet reflected here (they might be if the changes are officially released).
Besides that, you can do the whole process also only using CLI, have a look into the wiki and take the esp32 legacy path.
If you want to use Firefox for the process, then convince the mozilla foundation to support WebSerial. That’s the reason currently only Chromium based browsers are supported: only they support WebSerial which is necessary to do the process.
- i don’t understand what you mean.
- the switching of RX/TX is described in the official documentation and in the FAQ of this guide.
- can’t follow you.
- the official documentation clearly indicates that Chrome must be used. IMHO this is due to the Webserial Implemantation.
- I actually prefer CLIs where i can see what is happening and hack around myself.
All in all, I will no longer update the guide, the official documentation is now superior to the guide, all open questions are answered there.
I think you massively underestimate your manual if you really believe that https://tonies-wiki.revvox.de is better than your manual.
There is nothing in the wiki that comes close to your step-by-step instructions. As you say in the title, it’s a guide for newbies. I’m a newbie - I’ve never soldered before, never had anything to do with UART - I’m very grateful to you for the instructions - it was an incredible experience of success. The current documentation couldn’t even begin to help me, but your instructions did. But there are also lots of comments below that fill in the missing information. Because I’m more of a newbie than you probably intended to address with your instructions.